Switch from Chrome to Firefox in fifteen minutes
Install Firefox, pull your bookmarks and passwords across from Chrome, set it as the system default, and turn on the privacy basics. The whole move is one short coffee.
Chrome is the browser most people end up on, and the one that funnels the most data back to its maker. Firefox is the only mainstream browser left with an independent rendering engine (Gecko), an organization behind it that does not sell ads, and a settings page where you can actually turn telemetry off. Switching is a fifteen-minute job once a year, and it pays off every day after.
Honest caveats up front. Mozilla is not perfect. The default Firefox install talks to a handful of Mozilla services (telemetry, recommended add-ons, sponsored shortcuts on the new tab page) that you should know exist, and that this guide turns off. Mozilla’s funding still leans heavily on the Google search deal. If you want stricter defaults out of the box, LibreWolf and Mullvad Browser are Firefox-based options with the toggles already set the right way; we link them at the end. For most people, vanilla Firefox plus three minutes of settings is the right tradeoff between privacy and “still works on every site I use”.
Step 1: Install Firefox
Download from mozilla.org/firefox. The site detects your OS and gives you the right installer. On Linux, your distro’s package manager probably has it (apt install firefox, dnf install firefox, etc.); the Flatpak from Flathub is a fine alternative and tracks upstream releases closely.
End state: Firefox is installed and opens to a welcome page.
Step 2: Import bookmarks, passwords, and history from Chrome
Quit Chrome completely first. Including the background process that hides in the Windows system tray or macOS menu bar. If the password import silently skips your saved logins, this is almost always why.
Two paths lead to the same wizard; pick whichever you find first.
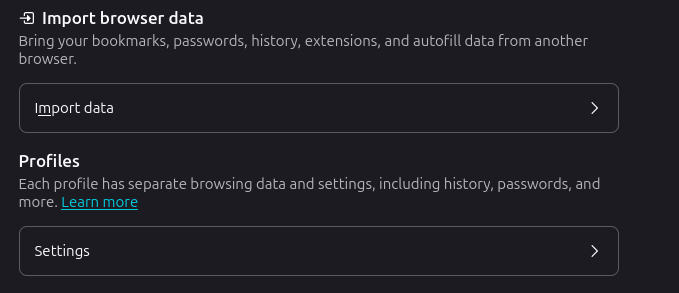
Via Settings (cleanest): three-line menu (top right) > Settings > General, scroll to Import browser data > Import data.
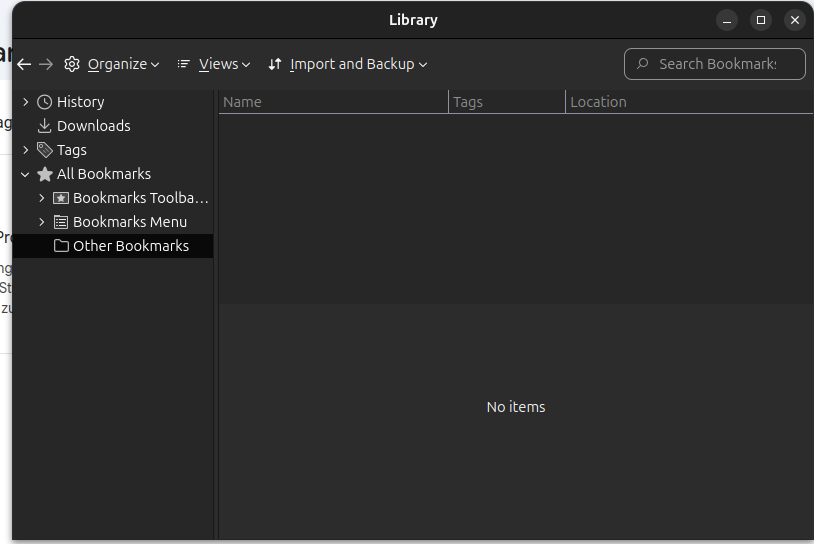
Via the Library window (older but still works): three-line menu > Bookmarks > Manage Bookmarks > Import and Backup > Import Data from Another Browser.
Either route opens the same wizard. From there:
- Pick Chrome (or Edge, Safari, Brave; the dialog lists everything it finds).
- Tick bookmarks, browsing history, saved passwords, and cookies if you want to stay logged into sites. Untick anything you would rather not bring across.
- Click Import.
End state: about:logins shows your old saved passwords. The bookmarks bar (View > Toolbars > Bookmarks Toolbar if you do not see it) holds your favorites.
Step 3: Set Firefox as the default browser
In Firefox, three-line menu > Settings > General > “Make Default”. This kicks you to the OS-level setting page.
- Windows 11: Apps > Default apps > Firefox > Set default. If a single click does not flip every link type, click into the detail page and reassign HTTP, HTTPS, .htm, .html one row at a time.
- macOS: System Settings > Desktop & Dock > Default web browser > Firefox.
- Linux (GNOME): Settings > Apps > Default Applications > Web > Firefox. KDE Plasma: System Settings > Default Applications.
End state: clicking a link in your mail client, chat app, or PDF reader opens Firefox.
Step 4: Privacy basics in two minutes
Settings > Privacy & Security.
- Enhanced Tracking Protection: set to Strict. This blocks more trackers and fingerprinters by default. A small number of sites occasionally break under Strict; the shield icon in the address bar has a per-site toggle if that happens.
- Cookies: Strict mode already isolates third-party cookies per site. Leave the rest at defaults.
- Firefox Data Collection and Use: untick “Allow Firefox to send technical and interaction data to Mozilla” and “Allow Firefox to install and run studies”. Untick the rest while you are there.
- Address Bar: untick “Suggestions from sponsors” and “Suggestions from the web”. Keep “Browsing history” and “Bookmarks” if you want the address bar to autocomplete.
- DNS over HTTPS: Enable in Settings > Privacy & Security > DNS over HTTPS. Pick the provider you trust (Mullvad and Quad9 are good defaults; Cloudflare is the easiest if you have no opinion). This prevents your ISP from logging every domain you visit.
End state: the shield icon shows tracking protection active, telemetry checkboxes are off.
Step 5: Add uBlock Origin
The single highest-leverage browser extension. It blocks ads and trackers across every site, costs nothing, eats almost no memory, and the author refuses every sponsorship offer he gets.
Install from the Firefox add-ons store. Click Add to Firefox, accept the permission prompt. Defaults are fine; the cog icon lets you allowlist sites you want to support.
End state: a red shield with a counter sits in your toolbar, and YouTube no longer plays ads.
Step 6 (optional): Mobile and sync
If you want bookmarks and open tabs to follow you between devices:
- Firefox Account. Three-line menu > Sign In to Sync. Create an account, pick what to sync (bookmarks, passwords, history, open tabs, add-ons). Mozilla can see encrypted sync blobs but not their contents; the master key is derived from your password.
- Firefox for Android or iOS. Install from the app store, sign in with the same Firefox Account. Bookmarks, history, and open tabs appear. On Android, Firefox supports uBlock Origin and other extensions; on iOS, Apple still forces every browser to use WebKit under the hood, so the engine is the same as Safari, but the UI, settings, and sync are Firefox.
End state: a tab open on your laptop shows up under “Synced tabs” on your phone within a minute.
If you want stricter
Vanilla Firefox plus this guide gets you 90% of the privacy benefit at zero ongoing effort. If you want the other 10%:
- LibreWolf is a community fork that ships with telemetry stripped, uBlock Origin pre-installed, and tighter defaults. Same engine, same extensions, same muscle memory. Drop-in for the security-conscious.
- Mullvad Browser is built jointly with the Tor Project. It is the Tor Browser anti-fingerprinting set, but used over your normal internet (or your Mullvad VPN), not over Tor. Designed for people who want to look like every other user, not like themselves.
- Tor Browser is the full thing. Slower (everything routes through three relays), some sites block it, but the strongest anonymity story available in a browser. Right tool for journalists, researchers, and anyone whose threat model includes their network.
Pick one if you have a reason. Otherwise stay on Firefox and call it done.
Verify it works
- Firefox opens to its normal start page; about:rights renders without errors.
- Your old bookmarks show up under Bookmarks > Manage Bookmarks (or on the bookmarks bar if you had one).
- about:logins lists your imported passwords.
- Clicking a link in your chat or mail app opens Firefox, not Chrome.
- Settings > Privacy & Security shows Enhanced Tracking Protection set to Standard or Strict, and a small number of tracking blocks already counted on the shield icon.
When something goes wrong
Chrome was still running during import
Firefox cannot read the password database while Chrome holds it locked. Quit Chrome completely, including any background processes (system tray icon on Windows, force-quit menu on macOS, pkill chrome on Linux), and run the import again from Bookmarks > Manage Bookmarks > Import and Backup.
Windows quietly puts Edge back as default
Windows 11 sometimes flips the default back to Edge after major updates, especially if you ever click "Open in Edge" out of habit. Settings > Apps > Default apps > search Firefox > Set default. If that does not stick, click into the "Set default for file and link types" page and reassign every HTTP, HTTPS, .htm, .html row manually. It is final once you do it the long way.
One site does not render correctly
99% of the web works. The 1% that does not is usually heavy Google Workspace pages or corporate intranets that sniff specifically for Chrome. Hard refresh (Ctrl+Shift+R or Cmd+Shift+R) first. If still broken, the User-Agent Switcher extension lets you spoof Chrome per-site without changing what you actually run.
Extension you relied on does not exist on Firefox
Search addons.mozilla.org. uBlock Origin, Bitwarden, 1Password, KeePassXC, Dark Reader, Vimium, Tampermonkey are all there. A handful of Chrome-only utilities have no Firefox counterpart, especially niche dev tools; in practice you will notice this once, find an alternative, and forget about it.
Old Firefox Sync account has stale bookmarks
If you used Firefox briefly years ago, your old account may still hold a snapshot of bookmarks from that machine. When prompted to sync, pick "Start fresh" rather than merging, or sign in with a new Firefox Account just for the current device.
Rollback
Chrome stays installed throughout this guide, so there is nothing destructive to undo.
If Firefox does not stick after a week, set Chrome as default again from your OS settings (same place you set Firefox). Your bookmarks and saved passwords are still in Chrome's profile; the import only copied them across, it did not move them.
If you signed into a Firefox Account for sync and want to leave it behind, Settings > Sync > Disconnect, then visit accounts.firefox.com to delete the account itself.
References
- Firefox download mozilla.org
- Mozilla support: Import data from another browser support.mozilla.org
- uBlock Origin for Firefox addons.mozilla.org
- Firefox Multi-Account Containers addons.mozilla.org
- Mozilla: Enhanced Tracking Protection support.mozilla.org
Comments (0)
No comments yet. Be the first.