Move your files off Google Drive, iCloud, OneDrive, or Dropbox
Export your cloud library from Google, Apple, Microsoft, or Dropbox; tidy the dump locally; upload to a privacy-respecting alternative. Most of the work is waiting for the download.
Big-tech cloud holds your most personal data unencrypted at rest, indexes it for product features, and ties access to an account that doubles as your advertising profile. The move off is one of the higher-leverage privacy decisions you can make in an afternoon. It is also one of the most procrastinated, because the friction is real: paid privacy clouds cost actual money, free tiers are stingier, and shared links break.
Honest tradeoffs up front. The privacy-respecting clouds we list on /alternatives/files charge 3 to 10 EUR a month for the storage tier most people need. Free tiers exist (Proton Drive gives 5 GB free, Filen 10 GB) but real photo and document libraries outgrow them quickly. Self-hosting (Nextcloud, Seafile) removes the subscription and adds a server. Pick the tradeoff you can live with for the next five years.
Pick the destination first
Trying to choose the new cloud while staring at a half-downloaded archive is how people give up and re-upload everything to Dropbox. Decide before you start:
- Proton Drive if you want end-to-end encryption, Swiss jurisdiction, and a bundle with Mail/Calendar/VPN. Apps for every platform. The strongest privacy story among the SaaS options.
- Filen if you want E2EE with a generous free tier, German jurisdiction, and per-feature pricing. Smaller team, smaller ecosystem.
- Nextcloud if you want full ownership and are willing to run a server (or rent a managed instance from a Nextcloud provider). Files plus office, calendar, contacts, photos, and a hundred other apps.
- Seafile if you want a leaner self-hosted option with a strong sync engine.
Pick one. The migration is the same shape regardless.
Step 1: Order the export from your old cloud
Each big-tech cloud has its own export portal. Trigger the export, then go do something else. The archive shows up by email or in your account dashboard hours or days later.
Google Drive
- Open takeout.google.com.
- Deselect all, then tick Drive (and Docs, Sheets, Slides if separate, depending on account type).
- Multiple formats > set Drive to deliver as your preferred format. The defaults (Google Docs > .docx, Sheets > .xlsx, Slides > .pptx) are the most portable. Pick PDF if you only need read-only copies.
- Next step > set delivery to Send download link via email, file type to .tgz, file size to 50 GB. This gives you one big file rather than dozens of 2 GB ZIPs.
- Click Create export. Google emails you when the archive is ready, usually within a few hours. Larger libraries take a day or two.
End state: an email from Google with a download link that points to one large .tgz.
Apple iCloud Drive (and most other iCloud data)
- Open privacy.apple.com and sign in with your Apple ID.
- Pick Request a copy of your data.
- Tick every category you care about. iCloud Drive Files is the main one; Notes, Calendar, Bookmarks, Mail, Photos matter if you use them.
- Pick the max archive size (Apple offers 1 GB to 25 GB; larger libraries get split).
- Click Continue. Apple generates the archive over up to seven days and emails you when each part is ready.
For files Apple does not include in this export (some iWork documents, certain Photos albums), download them directly from iCloud.com by signing in and downloading per category. The desktop app iCloud for Windows can also be used to sync everything down to a folder you then copy off.
End state: a stack of emails from Apple, each with a download link.
Microsoft OneDrive
- Open OneDrive.com and sign in.
- Click the gear (top right) > Options > Privacy > Download your data.
- Tick what you want; OneDrive offers your files plus other Microsoft account data.
- Submit the request. Microsoft prepares the archive and emails a download link.
Alternative for active OneDrive users: install the OneDrive client on your computer, let it sync everything to a local folder, then copy that folder out. Faster than the privacy-portal route if you already have the client running.
End state: a local folder mirror of OneDrive, or a downloaded archive from the privacy portal.
Dropbox
- Open dropbox.com and sign in.
- Click your avatar (top right) > Settings > General > Manage your account > Account export. Pick Export your data.
- Dropbox prepares the archive and emails a download link when ready.
For very large Dropbox accounts, the cleaner path is to keep the Dropbox desktop client installed, ensure everything is set to “Make available offline” (right-click > Available offline), and copy the local Dropbox folder to your new home. Then disconnect the client.
End state: either a downloaded archive or a fully-synced local Dropbox folder ready to copy out.
Step 2: Download, unzip, and check
When the archive lands:
- Download to a folder with plenty of free space. A 100 GB archive expands to roughly 100 GB; you need both at once during the unzip.
- Verify the download finished cleanly. Most browsers retry partial downloads; if yours did not, the archive will fail to expand. Re-trigger the export rather than wrestle a half-broken ZIP.
- Unzip. On Linux/macOS,
tar -xzf archive.tgzorunzip archive.zipfrom a terminal handles archives the GUI tools sometimes choke on for very large files. On Windows, 7-Zip handles everything the built-in extractor will not. - Spot-check. Open a few random files (a recent document, an old PDF, an image, a spreadsheet). If they open and look right, the archive is healthy. If a category is missing, return to Step 1 and request the export again with the right boxes ticked.
End state: a local folder tree mirroring your old cloud, with file counts and total size roughly matching what the old cloud’s web UI reports.
Step 3: Organize and deduplicate
The export is a useful moment to throw out files you have not opened in five years. Resist the urge to organize everything from scratch; you will lose three days. Aim for “good enough to find things”:
- Delete the obvious junk:
IMG_4839_copy_copy.jpg, draft documents superseded by finals, browser-download bin folders. - Decide on a small number of top-level folders (Documents, Photos, Receipts, Family, etc.). Use what you already had if it works.
- Run a duplicate-finder if the archive overlaps with files you already have locally. Free options: dupeGuru (cross-platform),
fdupeson Linux,rmlintfor the technically inclined.
End state: a local folder you would be comfortable making your “files” for the next five years.
Step 4: Convert proprietary formats (optional but worth it)
Microsoft .docx, .xlsx, .pptx and Google Docs / Sheets / Slides are usable in most editors, but you trade some fidelity. If you actively edit a small set of documents, converting them to OpenDocument formats (.odt, .ods, .odp) future-proofs them against the next pricing change at the source.
Pick one editor from our office category and stick with it: CryptPad in the browser, OnlyOffice for closest Microsoft fidelity, Collabora Online if you self-host through Nextcloud, LibreOffice if you want a free desktop app and do not need real-time collaboration.
Bulk-convert with LibreOffice’s command line:
libreoffice --headless --convert-to odt *.docx
libreoffice --headless --convert-to ods *.xlsx
libreoffice --headless --convert-to odp *.pptx
Keep the original .docx alongside as an archived copy until you have confirmed the converted version still looks right.
End state: actively-edited documents are in open formats; archived originals are kept side by side.
Step 5: Upload to the new cloud
Two ways, depending on size.
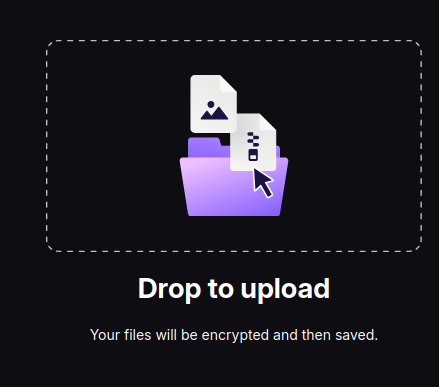
Drag-and-drop in the browser is fine for under 5 to 10 GB. Slow on very large folders, but no install needed. Open the new cloud’s web app and drag a folder from your file manager onto the window; most clouds reveal a drop zone like Proton Drive’s:
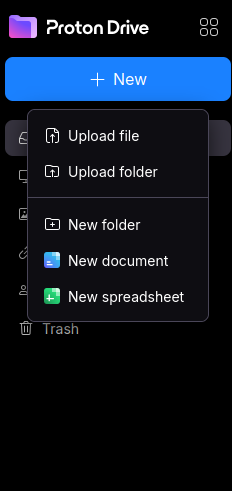
If you would rather pick files manually, the + New (or equivalent) menu has Upload file and Upload folder entries:
Desktop client sync is the right tool for everything larger. Install the new cloud’s desktop app, sign in, pick a local folder to sync to, and copy your downloaded archive into that folder. The client uploads in the background and survives sleep, network drops, and reboots. Most clients also let you pick a subset of folders to keep locally, so the desktop does not need to hold the whole library.
- Proton Drive: clients for Windows, macOS, Linux (community-supported), iOS, Android.
- Filen: clients for all major desktop and mobile platforms.
- Nextcloud / Seafile: desktop clients on all platforms, mobile clients with selective sync.
End state: the upload is running. Walk away.
Step 6: Cancel the old subscription (later, not yet)
Do not cancel the old subscription the day you finish uploading. Wait at least 30 days. You will catch the missing folder, the broken share link, the contact who emails you about a file they cannot reach.
After 30 quiet days:
- Sign in to the old provider, navigate to billing, cancel the paid storage tier (do not delete the account yet; the free tier is your final safety net).
- Uninstall the desktop client. Remove the system tray icon you have been ignoring for a year.
- Delete the mobile app, or at least sign it out.
Three to six months later, when you have not opened the old account once, delete the account itself if you want full closure. The data goes with it.
What this guide does not cover
- Photos. Different shape of problem (albums, faces, locations, edits, Live Photo motion). See /alternatives/photos, or self-host with the Immich guide.
- Email and calendar. Different exports, different destinations. We will cover these in dedicated guides.
- Sharing a household library. Most privacy clouds support family plans or shared folders; setup is per-provider and worth its own page.
This guide is the file-cloud half of the move. The rest follows once this one feels stable.
Verify it works
- The downloaded archive expands cleanly with no missing-file errors.
- Spot-check ten random files (text, image, PDF, spreadsheet, presentation); each opens correctly from the new cloud, on both desktop and the new cloud's mobile app.
- New cloud's used quota lands within 10% of the old one. Larger gap means something was missed or duplicated.
- Phone shows the same files from the new cloud's app and they sync both ways (edit on desktop, see the change on phone).
- Old subscription is canceled, or kept on the free tier as a 30-day safety net.
When something goes wrong
Apple's bulk export does not include everything
privacy.apple.com offers a bulk archive request, but several categories (iWork documents, full iCloud Drive contents, some Photos albums) still need to be downloaded category-by-category from iCloud.com or the iCloud for Windows desktop app. Plan to make at least two passes, and tick every relevant box on the privacy.apple.com export request the first time.
Google Takeout splits the archive into many 2 GB ZIPs
Default is 2 GB ZIPs and email links to each one. For a large Drive this means dozens of files and a flaky download experience. On the Takeout configuration screen, change "File type, frequency & destination": pick .tgz instead of .zip, set the file size to 50 GB, and have Google email a single link. The download is one big file you start once and walk away from.
Large libraries take longer than you think
A 200 GB Google Drive on a typical home connection downloads in roughly a day, not an hour. Apple's archive generation can take up to seven days before the download even becomes available. Trigger the export at the start of your weekend, do the actual switch on the next one.
Canceling the old subscription before the new one is proven
Keep the old account active (free tier is fine) for at least 30 days after you finish. Storage migrations look complete the day you do them and reveal a missing folder three weeks later. Once a month has passed and nothing surfaces, cancel.
Office documents lose formatting in the new editor
A .docx with complex layout, comments, or tracked changes will not always render identically in CryptPad, OnlyOffice, Collabora, or LibreOffice. Convert the small number of documents you actively edit to .odt or the new editor's native format, and keep the original .docx as the archived copy. See our office category for the editor options.
Shared links break on day one
The Google Drive link you sent to a collaborator three years ago stops working the moment you delete the file from Drive. If something is shared with people who depend on it, re-share from the new cloud and tell them once. Then expect to forward the new link to someone who only checks email twice a year, six months later.
Photos are a different shape of problem
iCloud Photos, Google Photos, and OneDrive Camera Roll are not just files. They carry albums, faces, locations, edits, and Live Photo motion data that an EXIF copy loses. Treat photos as a separate migration with its own tool. See our photos category, or follow the Self-host Immich guide if you want the full Google Photos replacement at home.
Rollback
This guide is conservative on purpose: the old cloud stays available until you have verified the new one.
- Keep the old account on its free tier for at least 30 days after the switch. Storage migrations always reveal a missing folder a few weeks later, and big-tech free tiers are roomy enough to hold the leftovers while you check.
- The downloaded archive on your local disk is the second safety net. Move it to an external drive after the migration; do not delete it until you have run for a full month on the new cloud without surprises.
- If the new cloud turns out to be the wrong call, you have two paths: upload the same archive to a different alternative (the export was the hard part; the second upload is mechanical), or restore the data to the old cloud while it is still on the free tier.
Do not delete anything anywhere until the 30-day mark passes.
References
- Google Takeout takeout.google.com
- Apple Data and Privacy privacy.apple.com
- Microsoft Privacy Dashboard account.microsoft.com
- Dropbox: Export your account data help.dropbox.com
- OpenDocument Format reference opendocumentformat.org
- rclone (scripted copy between cloud providers, advanced) rclone.org
Comments (0)
No comments yet. Be the first.